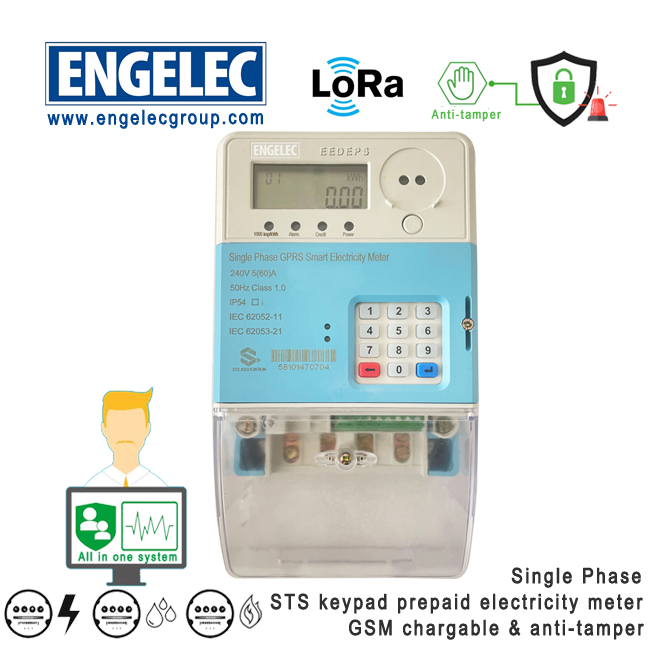
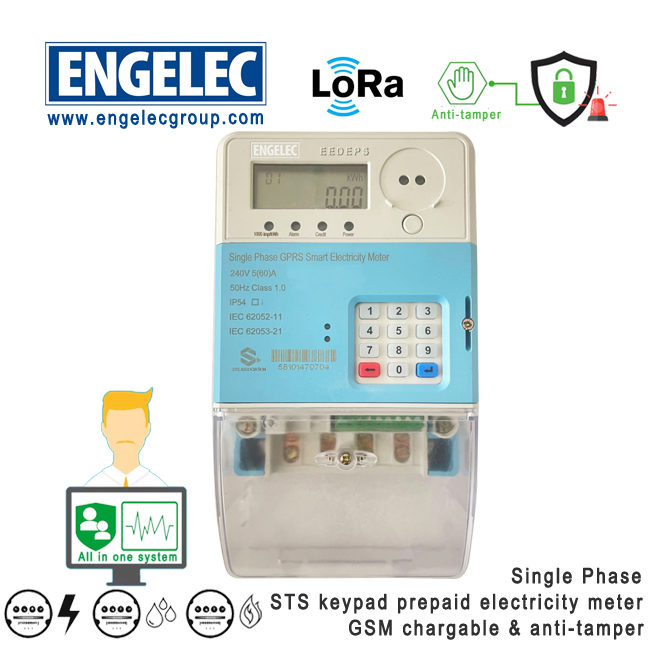
Single Phase Keypad Token Prepaid Electricity Meter GSM remote chargable - Code "EEDEPS"

1- LCD display with backlight.
2- LED indicators. From left to right are: Pulse, alarm, status credit.
3- Assistance terminals, and detector of terminal cover opening.
4- Optical communication port
5- Keypad contains 12 buttons (0~9, “  ← ”button and“ ↵ ”button) to enter TOKEN and query meter data.


General Description
EEDEPS meter is a single phase STS keypad type prepaid electricity meter. It can be charged by token through keypad input manually and our meterwizard cloud platform remotely. AlENGELEC prepaid meters can communicate with AMI system via LoRa-RF module or GSM/GPRS network.
Electrical Parameters
| Nominal Voltage | 220/230/240V |
| Working Voltage Range | 70%~120%Un |
| Nominal Frequency | 50-60Hz |
| Basic Current (Ib) | 5A |
| Maximum Current (Imax) | 80A |
| Starting Current (Ist) | 20mA |
| Active Energy Constant | 1000imp/kWh |
| Measurement Accuracy | Class 1.0 |
| Power Consumption in Voltage Circuit | <2W <8VA |
| Power Consumption in Current Circuit | <1VA |
| Operation Temperature Range | -25℃-70℃ |
| Storage Temperature Range | -40℃-85℃ |
Electric Magnetic Compatibility
| AC Insulation Strength | 4kV at 50Hz during 1min |
| Impulse voltage 1.2/50 us mains connections | 8kV |
| Electrostatic Discharges | Contact discharge | 8kV |
| Air discharge | 16kV |
| Electromagnetic RF Field | 27MHz-500MHz | 10V/m |
| 100KHz-1GHz | 30V/m |
| Fast transient burst test | 4kV |
| Protection | Class II |
Basic Features
1. LCD display screen with back light
2. Pulse: kWh consume indicator
3 Alarm:
3.1 The cover was opened.
3.2 The load is reverse, unbalance, or overload.
3.3 The voltage is over voltage, or under voltage.
4 Status credit: credit indicator
4.1 The green LED indicates the remained credit is enough.
4.2 The yellow LED indicates the remaining energy is below remained energy threshold 1.
4.3 The red LED indicates the remain credit is below remained credit threshold 2.
4.4 When the red LED is flash, it means the remaining credit is below remained credit threshold 3.
5 Keypad contains 12 buttons to enter TOKEN and query information
6 Optical port complies with IEC62056-21
7 Open cover detector inside the terminal
8 Operation principle
As shown in figure 3, the current and voltage of power covered into small signal separately and input into a special measurement IC, after a series of process such as multiplication calculation etc. and then output energy pulse, whose frequency is in direct proportion to the supply power, to the microprocessor unit (MCU). The MCU calculate and process energy impulse to perform the power metering and load control functions etc. The LCD displays the total credit and remained credit etc. relay tripping off indirect shows the meter operation state.


Application of TOKEN
Operation of vending software
1. Login vending system
2. Meter number registration
3. Customer information registration
4. Price Setting
5. District and sales point registration
6. Open Account
7. Vending/Topping up meters
8. Get the Token
9. Input Token to meter with keypad
10. Recharging successfully
Token Charging
1. Purchase credit
Customer purchases the credit with Meter factory own vending software.
2. Entering TOKEN
Tokens are entered by the keypad on the meter. The meter sounds a “bi” every time a button  pressed and displays the number on the main display area of the LCD. The number entered last displays at the most right-hand side. Per 4 digits appear “-”, When the eighth digit entered, the digit entered first will be moved out of the LCD. Press “← ” to delete, from the end of numbers.
| Figure | Description |
 |   Before pressing “← ” button. Before pressing “← ” button. |
 |   After pressing “← ” button, the last digital “7” is deleted. After pressing “← ” button, the last digital “7” is deleted. |
3. Recharge success
 After finish these 20 digits TOKEN, press “ ↵ ” key to confirm. If the TOKEN is correct and accepted by meter, it will display “
 √”indicator on the LCD and remind by sound “bi”. New purchased credit will be charged to meter.
| Figure | Description |
 | Eleven digits have been input, the last  one is "9". one is "9". |
 | After all of the TOKEN numbers input, Press "↵" to confirm. Press "↵" to confirm. |
 | The TOKEN is correct and accepted by the meter. Indicating “ ACCEPT” and "√" . meter. Indicating “ ACCEPT” and "√" . |
 | The new charged credit of TOKEN is 50kWh. 50kWh. |
4 Recharge failure
Meter will sound “bi” three times and the indicating of " X" and show “used” or “old” or “reject” on LCD. Failure code will be displayed on left of LCD. Remaining credit will not be changed.
5. Keypad lock-out function.
If continously input wrong TOKEN more than 10 times, the meter keypad will self-lock for security. Max. locking time is 60 seconds. But the user can use keypad to query meter data except charging fee.
Connection diagrams

Overall and mounting dimension





 ← ”button and“ ↵ ”button) to enter TOKEN and query meter data.


